Wednesday, 5 October 2011

Button Up

Its time once again for another challenge over at Divas & this week its Button Up & therefore we want to see buttons on your creations. This week is sponsored by Crafty Emmas.

I used a Cuttlebug flower folder, which I had never used before to make the flower, I then ran it through the Cuttlebug again, using a Swiss Dot folder this time, onto which I stuck 2 buttons to make the centre. I also used a Cuttlebug border & stuck that along the bottom edge, onto which I stuck more buttons.
Paper is from stash, as are the flowers & ribbon & brad. The leaves are a Sissiz die, coloured with Promarkers. Sentiment is a freebie from blogland somewhere.

I am looking forward to seeing what you can create using buttons & don't forget to pop over to the Divas blog & see what my fellow DT have made this week.

I am away on holiday at the moment, & whilst I have internet, its very slow, so please bear with me if I am not getting around blogland as usual & commenting on my favourite blogs.

Entered into the following challenges
Totally Stampalicious Embossing
Anything Goes Die Cuts/ Punches
The Poodles Parlour Buttons/ Brads

Sunday, 25 September 2011

Twisted Santa!!

I wanted to have a go at the twisted easel cards that I had seen in blogland & decided to have a go.. Over at Come & Get It Challenges I had won a top pick for my Back To School card & they asked me to be a GDT for this week using an easel card as a technique, so it was perfect to combine the two.
The image is from Make It Crafty which I coloured with Prisma pencils.
Papers I bought last year & cannot remember who or what they are, but they are glittered as is most of this card...lol.  Ribbon, Dew Drops & Pointsettias all from stash. I have a Christmas bag with all my embellies etc in & each year I completely forget whats in there!
Copious amounts of glitter glue used around the edges of the card & I also got out embossing powder to make the sentiment which was a wooden stamp (unmarked) I have owned for years.
Voila, a twisted easel card which I am very pleased with, however I note that I have not been featured in the above challenge!! Hopefully an oversight.
Entered into the following challenges
Fussy & FancyTtry new technique (Twisted easel)
One Stop Cards Easel Cards
Victorine Stamps Easel Cards
Bows n Berries Glitter

Monday, 19 September 2011

Xmas Robin

After a very busy weekend, I managed to make this card  on Sunday evening. BP are from Bearly Mine Christmas Sparkle collection. The image is Pink Gem which was a freebie last year. It was & still is one of my favourites, so I coloured him up with Promarkers & used My Craft Studio to colour the card to match the bluey backing paper & mounted him following the sketch over at A Gem of a Challenge. Flowers are a combination of stash & Wild Orchid Crafts. Ribbon which has been made into a double bow is from stash & the sentiment is from a See D bought from QVC years ago.
Entered into these challenges
Pink Gem Sketch
Cutie Sunday Xmas
Little Miss Muffet Things with Wings

Tuesday, 13 September 2011

Fishy Tail

This is an image that I got when I was a member of the OSAAT DT, unfortunately the drawer of the stamp is no longer with OSAAT, so I cannot give a link.
I coloured with Promarkers & then gilded it, using my neglected Gilding Flakes. It looks splotchy in the photo, but it doesnt in real life, promise...lol
I framed the image with 3d foam & using papers from Bearly Mine, although these were a freebie from last year I think & cut out the oval with my Nesties. Backing paper is also Bearly Mine, from the same freebie set.
Added flowers & ribbon from my stash & from my monthly subscription to DuckPond Crafts ,as is the stick pin. I also gilded the leaves & a little flourish on the frame, as well as the sentiment & followed the sketch over at Sketch & Stash
Sentiment from a QVC kit purchased years ago & a little fish charm added to finish off.
I am entering this into the following challenges
Sketch & Stash Using the above sketch. Neglected stash Gilding Flakes & New stash flowers, ribbon & pin
Sir Stamp A Lot Frames
Pile It On Lots of layers
Die Cut Dreams Flower Power (at least 5 flowers, I have 8 on there)
I Love Promarkers Metal charm/embellishment

Wednesday, 7 September 2011

Back To School

Its time for another challenge over at Divas By Design & this time its ''Back To School'' & is sponsored by Crafty Sentiments.
I chose an image & the backing paper from Tiddly Inks. The backing paper is now in the basement section at $1.00. My image is coloured with Promarkers & the embellies come from a sheet given away as a freebie by Shirleys2Girls which I matted onto matching card. The calculator & crayons are buttons bought from my local stationers.
Don't forget to go on over to Divas & see what my teamies have also made this week & I look forward to seeing your entries.
Entering into the following challenges
Come & Get It Challenges Back To School
Guylou's Immitability Back To School
Pixe Dust School Is Cool
Stamp Insanity Back To School
Fashionista Friday Back To School

UPDATE I have won Top Pick with this card over at Come & Get It Challenges

Monday, 5 September 2011

Its been awhile!

Now I don't usually put much about my private life here on my blog, but just want to explain why I have not been around much. (Mind you I dont think I have been missed anyway). I have arthritis & its flared up recently which has left me in a lot of pain & not wanting to be creative at all.

Anyway I did sit down & make a card, I had made my DT card for Divas ages ago & that will be shown on Wednesday.

I started out by colouring with Promarkers an image by Kenny K called Skater Chick. The backing paper is by Toucan Scraps over at the OSAAT store called City Street, onto which I added a sentiment in Dripping Markers font to look like it had been spray canned.
 I then googled trying to finda graffiti artist or something as I had this idea in my head & came across this image of a Graffiti girl at Edupics which was free to use for non commercial use. This was perfect for what I had in my head. I coloured this again with Promarkers.
I have been admiring Make It Crafty urban,street images, but thought I had better not spend any money right now, so made my own dustbins by cutting out of silver paper & scoring to look like metal dustbins. It is difficult to photograph as my reflection kept showing up in the photos.
Added some silver rik rak & some candy & here is my first card in ages.
I have entered it into the following challenges
Birthday Sundaes Birthday sentiment
Creative Card Crew Annything Goes
Charisma Cardz Anything Goes
Card Makin Mamas Use a digi (paper & images)
Stamp Something Use a digi

Sunday, 21 August 2011

Magnolia Notice Board

In November I am going away for 5 days with friends on a crafting weekend in Yorkshire, we stay in a cottage & generally have a good time. I have been asked to do a class whilst we are there & this is what I have come up with. I saw a similar idea at Sir Stamp A Lot hanging up & thought I could make my own, the one at Sir Stamp A Lot was a kit, made out of chipboard & had a peg for the pencil holder I started by buying some foam board from Hobbycraft & cut out 2 x 20cm squares & made holes using my manual hole puncher (Crop O Dile wouldnt go through as board too thick). I then covered it using papers in my stash.
I then used my Craft Robo to cut out 8 circles in card & I attached them to the corners to provide more protection for the corners, by cutting away a quarter of the circle & folding around the corner. I coloured them using Promarkers.
I then painted blackboard paint onto cardboard that I had saved from some curtain packaging I had recently bought & attached that to one of the boards & decorated the top with flowers.
To the bottom board, I attached a ribbon using brads & glue, which allowed me to add the jotter pad by hooking it over the ribbon.
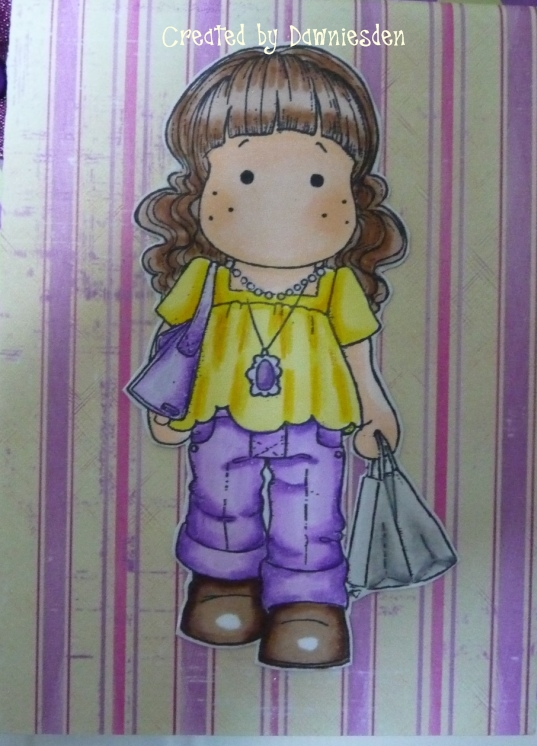
I covered the jotter in contrasting papers & added a Shopping Tilda to the front.
I then added ribbon to the top board by knotting it at the front of the board & also between the 2 boards by tying the ribbon at the back. I also coloured this to match the corners with the same Promarker.
I then had to decide how to attach the chalk & the pencil, so sat down with my Craft Robo & designed 2 holders, which again I covered with papers the same as the jotter & added  flowers to each. I then stuck them on using glue.
Lastly I added another Tilda to the bottom right hand of the blackboard to finish off.
Hey presto a notice board to make in Yorkshire. Now I have to prepare another 7 kits to allow the others to make it too.
Entered into these challenges.
Magnolia Stamp Lovers Flowers
Sir Stamp A Lot Whatever You Fancy
Craft Us Crazy Anything Goes
Creative Craft Challenges Anything But a Card
Craft Your Passion Anything But a Card